
Build your Blog for Free Using GitHub Pages
Installation Environment (Linux)
Installing Hugo
yum system
sudo yum install hugo -y
Arch
sudo pacman -S hugo
deb system
sudo apt install hugo
Installing Git (Skip this part if pre-installed)
yum system
sudo yum install git
Arch
sudo pacman -Syu git
deb system
sudo apt install git
Installation Environment (Windows)
Installing Hugo
https://gohugo.io/getting-started/installing/#less-technical-users
Installing Git
winget install Git.Git
Start Building the Website.UwU.!
Creating a GitHub Project
P.S. Due to some reasons, GitHub may be inaccessible in certain areas in China.
Solution: Use a VPN or switch to Gitee (requires real-name authentication).
-
Create a project named
YourGithubUsername.github.io. -
Keep it for later use.
Building Website Locally
Note: My local environment is Kali Linux. The steps may vary in other environments.
Open the terminal/cmd/whatever and type:
hugo new site NameOfYourWebsite
Now Hugo will generate a website for you.
Ahem, next, visit https://themes.gohugo.io/ to find a theme you like.
Navigate to the themes directory of your local hugo website.
cd WebsiteName/themes
Then place your theme inside.
git clone URLofYourThemeFromGitHub.git
Once the theme is in place, follow the documentation to configure your site.
Documentation for Stack theme: https://docs.stack.jimmycai.com/zh/
Basic Configuration for the Stack Theme
-
Copy
YourWebsiteName/themes/hugo-theme-stack/exampleSite/config.yamlto the root directory of the website (i.e., theYourWebsiteNamedirectory). -
Delete
config.tomlfrom the website root directory. -
Open
config.yamlin the website root directory and fill in the details.
Tips:
The author’s avatar goes in
/themes/hugo-theme-stack/assets/img/.About the emoji below the avatar: If you don’t want to add it, leave the line for emoji empty.
Stack Troubleshooting
Edit:
Well… since I posted this article, many have become “Stack enthusiasts”.
Given the theme’s popularity, I’ll share more insights about my configuration experience.
Q1: What if posts don’t appear on the homepage?
Edit config.yaml in the website root directory.
params:
    mainSections:
        - posts
Q2: How to configure comments?
I chose Gitalk for comments.
comments:
        enabled: true  # set to true to enable comments
        provider: gitalk
Gitalk configuration:
gitalk:
            owner: YourGitHubUsername
            admin: YourGitHubUsername
            repo: YourGitHubRepositoryName (NOTE: not the URL!!!!!!!)
            clientID:
            clientSecret:
#DO NOT share your ClientID and ClientSecret!
How to get ClientID and ClientSecret:
Go to GitHub developer settings and create a new OAuth App.

Fill in the required fields:
Application Name: Any name
Homepage URL: Your blog’s URL
Application description: Any description
Authorization callback URL: Your blog’s URL
Enable Device Flow: Do NOT tick
After saving, you will receive the ClientID. Click Generate a new client secret below the Client Secret box.
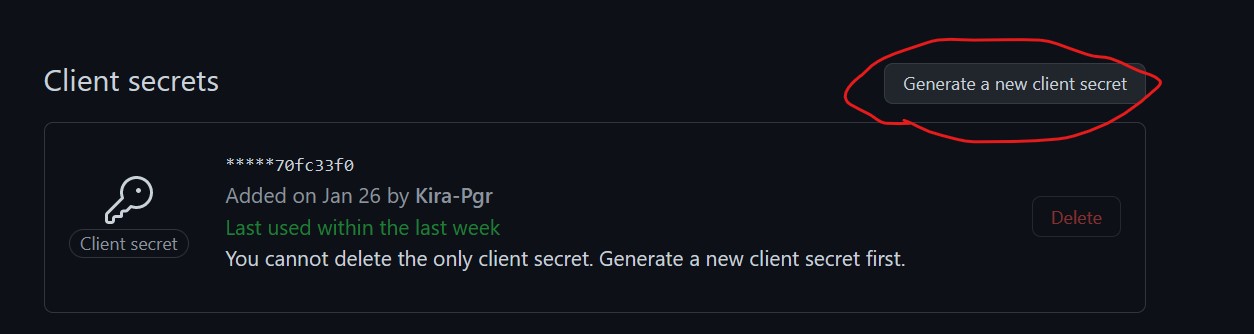
Note: You can only see the Client Secret once.
Q3: Customization and Beautification
I don’t find much need for customization; usually, it’s just about adding quirky stuff. Still, let’s discuss it.
Paths related to customization:
WebsiteRootDirectory/layouts/partials/head/custom.html # HTML inserted at the head of all pages
WebsiteRootDirectory/layouts/partials/footer/custom.html # HTML inserted at the footer of all pages
WebsiteRootDirectory/static/ # Path for resource files like js, css, etc.
Lastly, here’s a lazy method I wrote for beautifying Stack blogs: Link
Run the website locally
Open terminal/cmd/your preferred command-line tool in the website root directory.
Type:
hugo server
You can now visit http://127.0.0.1:1313/ in your local browser to see your website.
Writing Blogs
About Markdown
Familiarize yourself with Markdown syntax before writing blogs.
Tip: You can use MarkText (an open-source markdown editor) for blogging. It offers a more comfortable experience.
(I used this tool to write this article)
About Directory Structure
-
Your articles are in
WebsiteRootDirectory/content/posts/. -
Your “categories” are in
WebsiteRootDirectory/content/categories.
Give it a try!
First, create an md file. Open terminal/cmd/… in the website root directory and type:
hugo new posts/AnyNameYouLike/index.md
Open index.md and replace the autogenerated content with:
---
title: "Article Title"
description: "Description"
date: 2022-01-29T02:02:45-05:00
image: "ImageNameInSameDirectory(with file extension and relative path)"
categories:
    - Category1
    - Category2
tags:
    - Tag1
    - Tag2
---
NOTE: Different themes might have different formats. Check the documentation if you’re not using the Stack theme.
You can now start writing the article content.
Tip: Place referenced images in the same directory.
Publishing the Website on GitHub
Whew, once you complete this step, your website will be publicly accessible.
NOTE: Keep the local environment. You’ll need it for future blog posts.
Publishing the Website
Open terminal/cmd/and so on in the website root directory. Type:
hugo --theme=ThemeDirectoryName
Navigate to WebsiteRootDirectory/public.
cd public
Create a .git directory in public:
git init
Add all files to the git repository:
git add .
Commit:
git commit -m "Initial commit"
Note: If your commit failed, it might be due to git not being properly configured. Fix it by following the steps:
git config --global user.email "[email protected]"
git config --global user.name "Your Name"
Then retry the commit.
Connect your repository to the website:
git remote add origin https://github.com/YourGitHubUsername/YourGitHubUsername.github.io.git
Push to GitHub:
git push -u origin master
Wait for a while and then visit https://YourGitHubUsername.github.io/ to see your website!
Congratulations! Your Hugo blog is now live on GitHub!
Ref
如何使用 GitHub 搭建博客 - WeepingDogel
https://docs.stack.jimmycai.com/zh/
English translations by GPT-4